Why the Horizon Matters More Than a Dark-Sky Label
A dark-sky label cannot tell you what blocks the horizon. Learn to assess a viewing spot on foot and choose a place that fits your skywatching plans.
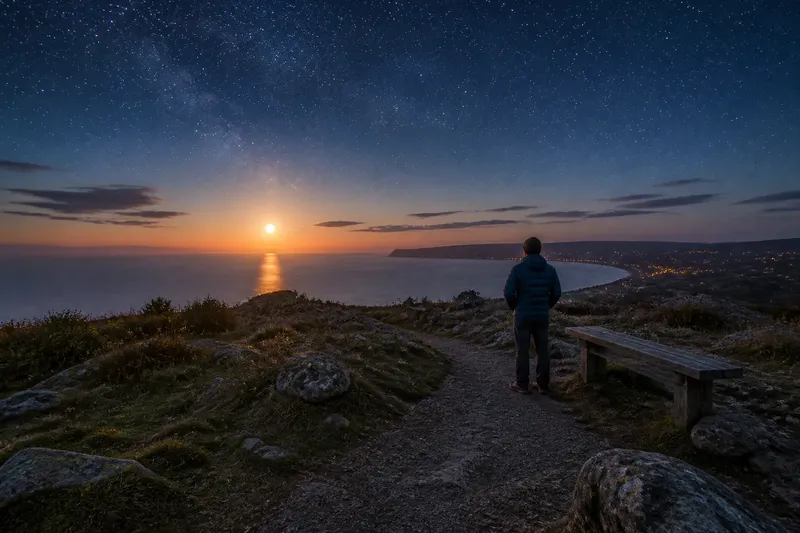
A dark-sky label cannot tell you whether a ridge will hide the Moon as it rises or a line of trees will swallow a planet before you see it. For a useful dark-sky visit, the horizon matters as much as the darkness overhead: its shape decides which parts of the sky are actually available from where you stand.
That difference is easy to miss when choosing a destination from a map. A sheltered clearing may feel wonderfully dark, yet offer only a narrow window between surrounding slopes; a more open viewpoint may show the sky from low in the east to low in the west, while a nearby town glow remains visible. Neither feature alone settles the choice. The right spot depends on what you hope to notice.
What the horizon reveals
The horizon is the boundary where the sky appears to meet the land or sea. It is not always a clean, flat line: hills, forest edges, buildings and even nearby embankments can raise it, while a broad plain or open coast may leave much more of the sky exposed.
That obstruction changes what you can see and when. A low-rising Moon, a planet near the horizon, or a meteor streaking through a lower part of the sky can be hidden by terrain even when conditions above are clear. A wide horizon can also make it easier to follow twilight colours, watch a bright object emerge, or notice the changing position of the Moon over a longer stretch of evening.
Darkness and openness are separate qualities. The first concerns how much artificial light brightens the sky; the second concerns how much sky your position can see. A site may be dark but enclosed, open but affected by distant lighting, or strong on both counts.
Three kinds of viewing spot
Rather than searching for one perfect label, compare the shape of the place with the kind of skywatching you have in mind. These three broad options make the trade-offs easier to see.
The enclosed clearing
A clearing within woodland or a hollow between hills can feel calm and sheltered. Trees and slopes may screen headlights or nearby lights, and the surrounding land can make the visit feel contained rather than exposed.
The cost is a restricted horizon. If the treetops form a high ring around the clearing, objects close to the horizon may not appear until they have climbed into the opening, and some may remain hidden altogether. This type of spot can suit someone content to look at a high, central patch of sky, provided the ground is suitable and the access arrangements are clear.
The open upland
A ridge, plateau or broad hillside can reveal a long sweep of sky. It may be a good choice for watching an object rise or set, comparing the sky in different directions, or simply noticing how the stars fill a wide view.
Openness brings exposure as well as visibility. Wind, cloud moving across the ridge and the lack of shelter can make a long stop uncomfortable, while nearby settlements may still brighten one part of the view. A broad outlook is most useful when the route and stopping place are appropriate for visitors, not merely because the ground looks empty on a map.
The coastal edge
A beach or clifftop can give a remarkably open view over water, especially where the land behind you is low. The sea can leave a clear-looking horizon in one direction, making the place appealing for watching a Moonrise or the last colour after sunset.
But the open side may be only half the story. A headland can block another direction, shore lights can intrude, and low cloud or haze over water can soften objects near the horizon. A coastal viewpoint suits a plan focused on the seaward sky; it may be a poor match if you need a clear view all around.
Assess a spot on foot
You do not need binoculars, a phone app or a compass to make a useful first assessment. Take a slow look around from the place where you would actually stand or sit, rather than judging the view from a road, parking area or photograph.
- Trace the skyline. Look for the highest nearby obstacle in each direction: a hill crest, roofline, tree canopy or rising bank. Notice whether one side is much more blocked than the others.
- Check the low sky. Imagine the sky as a series of bands rising from the land. Ask whether the lowest band is open, partly cut off or hidden for a broad stretch.
- Look for a usable standing area. A wide view is of little help if you can only see it from an unsafe edge, a private field or a place where visitors would obstruct others.
- Notice bright directions. Look for visible lamps and the glow above settled areas. A gap in the horizon does not necessarily mean that section of sky will look dark.
- Check whether the view changes nearby. A short move within an authorised public area may open a blocked direction, but avoid wandering into closed land or fragile vegetation.
- Consider the return view. On leaving, will the route be easy to follow in darkness, and does the path avoid steep or confusing ground? A lovely skyline is not a reason to take an unsuitable route.
Imagine you have chosen a wooded picnic area because a map marks the surrounding region as dark. On arrival, you find that the trees hide most of the eastern skyline, where you hoped to watch the Moon rise. If a signed, level public viewpoint nearby opens that direction, you could choose it for the Moonrise and return to the sheltered clearing later for a higher view; if there is no suitable alternative, change the plan rather than forcing the location to fit it.
Match the view to your plan
For a broad, all-sky look, the best choice is usually a place with a low, open skyline in several directions. This is especially helpful when you want to move your gaze around, follow a meteor shower across different parts of the sky, or watch the sky change through the evening.
For a specific object near the horizon, the relevant direction matters more than a panoramic view. If you want to catch a Moonrise, for instance, a location with an open eastern skyline may be more useful than a darker hollow that faces away from it. The Moon’s position shifts over time, so check a reliable sky calendar or observing app for the direction and timing before choosing where to stand.
For brighter objects higher overhead, a partial horizon can be perfectly workable. A sheltered site may suit a short, relaxed visit if the main view overhead is clear and the objects you hope to see will rise above the surrounding tree line or ridge. You do not need to reject a place simply because it fails to reveal every direction.
For twilight, dawn or a low planetary pairing, ask not only whether the relevant direction is open but whether you can remain there comfortably and legally at the needed time. A view that works at sunset may be closed after dark, or a public path may have restrictions. Check access information before travelling, and choose a location that permits the visit you intend.
Which view fits your visit?
Is a dark-sky label enough to choose a spot?
No. A label can help identify a region valued for its night sky, but it does not describe the skyline from a particular path, car park or clearing. Assess the actual viewpoint and the direction you need.
Do I need a flat horizon for stargazing?
No. Many stars and bright objects spend much of an observing session well above the horizon. A low skyline matters most when you want a wide sweep of sky, a low-rising object or a clear view at twilight.
How can I check a viewpoint before travelling?
Use a map to understand the broad terrain, then inspect recent photographs or a street-level view if available. These can help you spot ridges, trees and buildings, but they cannot replace checking access and making a careful visual assessment on arrival.
Should I choose the darkest or the most open place?
Choose according to the observation: darkness helps with faint sky detail, while an open horizon helps with objects and events low in the sky. When the plan is flexible, a site offering a useful balance is often more satisfying than one that excels in only a single direction.
Make the choice practical
Before setting out, write down the one thing you most want the visit to provide: a broad view, a particular horizon event, a sheltered place to sit, or a dark backdrop for faint stars. Then use a map and the site’s access information to shortlist locations with the right shape of skyline, rather than treating a designation as a promise of a particular view.
On arrival, give yourself a moment to look around before unpacking or settling in. If the terrain blocks your intended direction, revise the plan: turn to a better-open part of the sky, choose another permitted viewpoint, or save that observation for another location. A dark-sky label is a useful starting clue; the horizon at your feet is what tells you how the sky will actually meet your evening.